Configure LoG
Shows step by step how to configure the view settings for each LoG level.
Before you begin
You would like to adapt LoG levels to the requirements of an agreed LoG scheme.
Navigate to:
Note:
The configuration of individual LoG stages is saved on the project. A customized scheme can be created for different projects with different requirements.
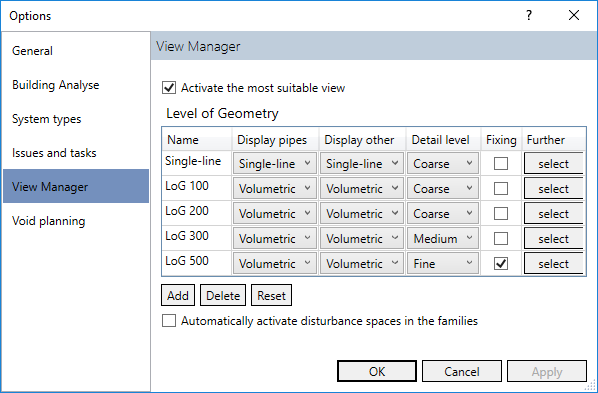
Procedure
- Create a new entry by clicking Add or adapt the names of existing LoG levels if necessary.
- Select from the drop-down lists the respective levels of detail for pipes, ducts and non-TBE elements.
- Activate the visibility of fixing elements for all desired LoG.
- Click select at Further and activate the visibility of manufacturer details for all desired LoG.
- Activate Automatically activate interference spaces in families to automatically activate the view control in the type properties in families that already have interference spaces.
- Confirm your settings by clicking OK.
Results
The LoG levels are set according to the requirements and are saved with the project.