Configure LoG for View
Shows step by step how to configure the LoG for a view in your project.
Before you begin
You would like to configure a Level of Geometry for a certain view, for example to create plans for a neutral tender.
Requirement:
No elements are selected in order to display the properties of the view.
Navigate to:
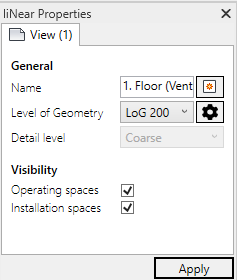
Procedure
- Open the view for which you would like to configure the LoG.
- Select the desired LoG from the Level of Geometry drop-down list.
- Click Apply.
Results
The current view is displayed with the view settings of the selected LoG.