Naming Pipe Runs and Assigning Passive Protection
Shows step by step how to assign passive protection and a name to section parts in the gas pipe network.
Before you begin
The pipe run names will be displayed in all dialogs and in the printouts. The Material protection selection under passive protection influences the material output of the pipes in the material list.
Requirements:
-
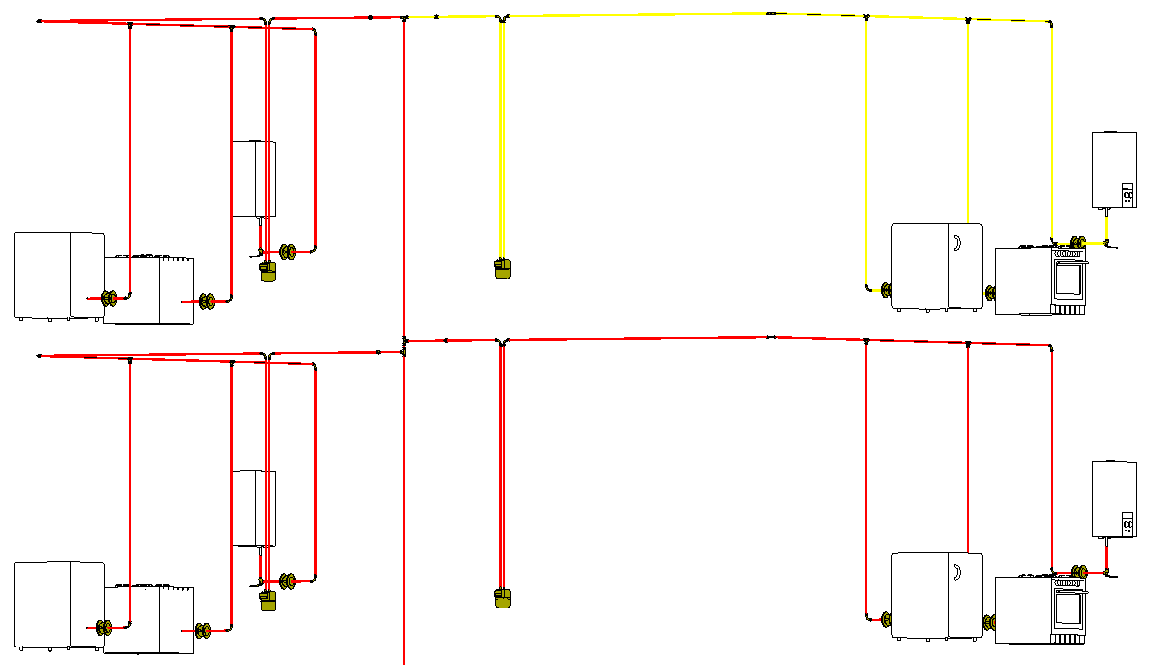
The pipe network is closed an can be calculated.
-
The pipe network is detected.
Navigate to:

Procedure
- Click Pipe runs.
The Pipe run settings dialog opens.
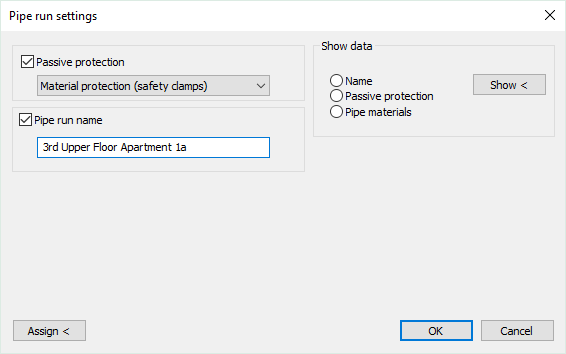
- Activate the Passive protection check box and select the type of passive protection.
- Activate the Pipe run name check box and enter a name.
- Click Assign<.
- In your model, select the section parts that are to receive the passive protection and the name and confirm with Enter. Note:
When assigning, please note that properties changes can only be carried out behind T-pieces and behind built-in parts with dimension changes.
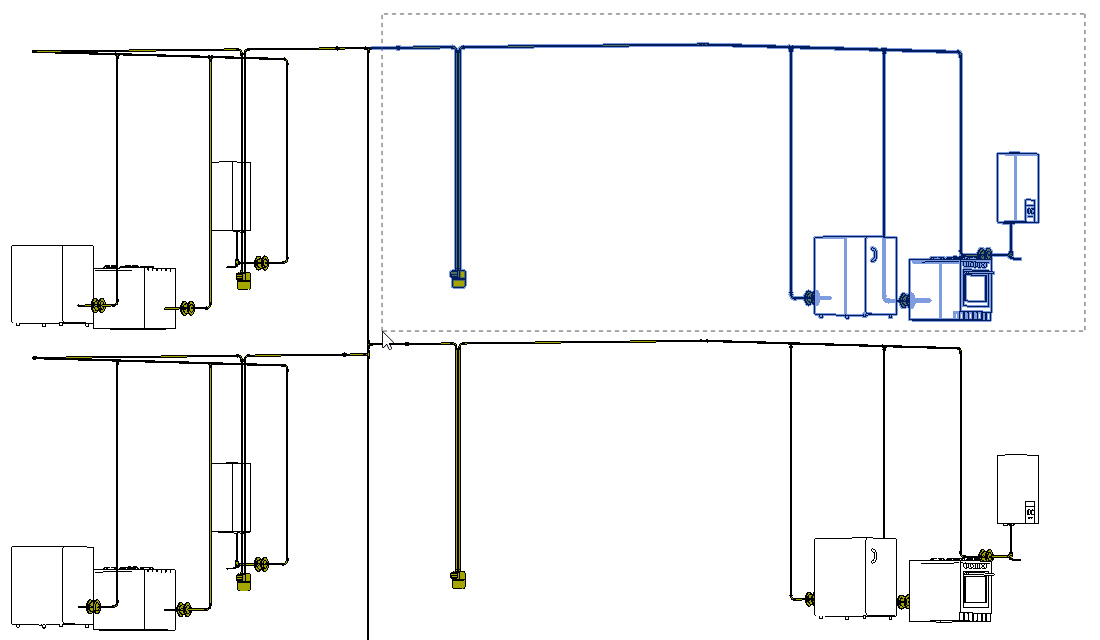
- If necessary, repeat the steps 2 to 5 to make more assignments.
Results
The passive protection and the name are assigned to the section parts and can be checked by the Show < function.