Import Room List without ID Assignment
Shows step by step how to import room lists without ID assignment into Revit.
Before you begin
You have an Excel list of rooms and parameters without Revit-specific ID assignment and want to add the content of this list to your model.
Requirements:
-
The file has to be in xlsx format.
-
The file may not be open.
Navigate to:

Procedure
- Click Excel-Import in the section Interoperability. Tip:
If Excel-Export is displayed, click on
 and select Excel-Import.
 - Select the xlsx file to be imported.
The dialog Default settings opens.
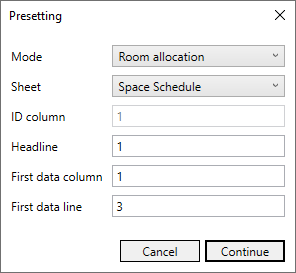
- Select the Room Allocation Mode and the worksheet you want to import.
- Check if the column and row specifications match the structure of the list and click Next.
The dialog Room allocation opens.
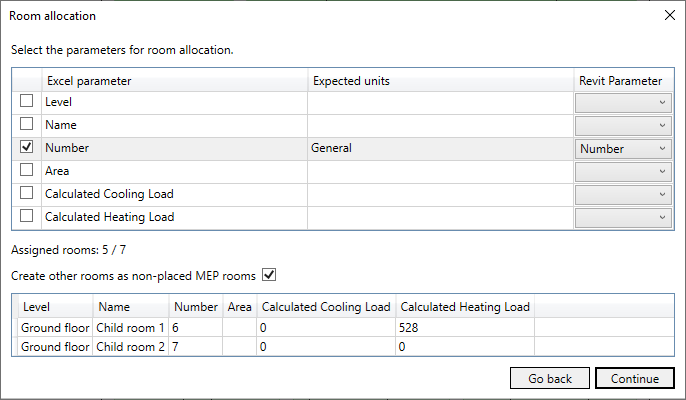
- Select the Excel parameters using the you room allocation and assign the appropriate Revit parameters to the Excel parameters. Tip:
If the assignment with one parameter is not unique, you can assign additional parameters for the assignment.
- Activate the checkbox Create other rooms as non-placed spaces and click Next.
The dialog Import: … opens.
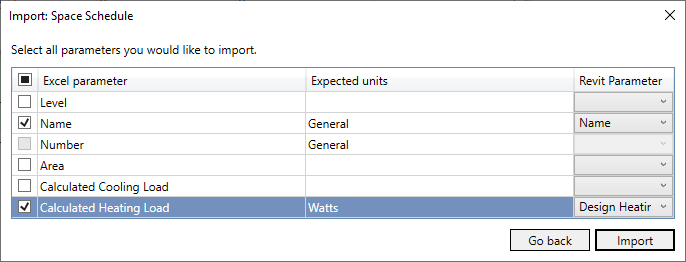
- Mark the Excel parameters you want to import and assign the appropriate Revit parameters to the Excel parameters .
- Click Import. Tip:
If parameters should be written to an element which is write-protected, an error message is displayed during import and you can display the error log with more detailed information about the cause of the error.
Results
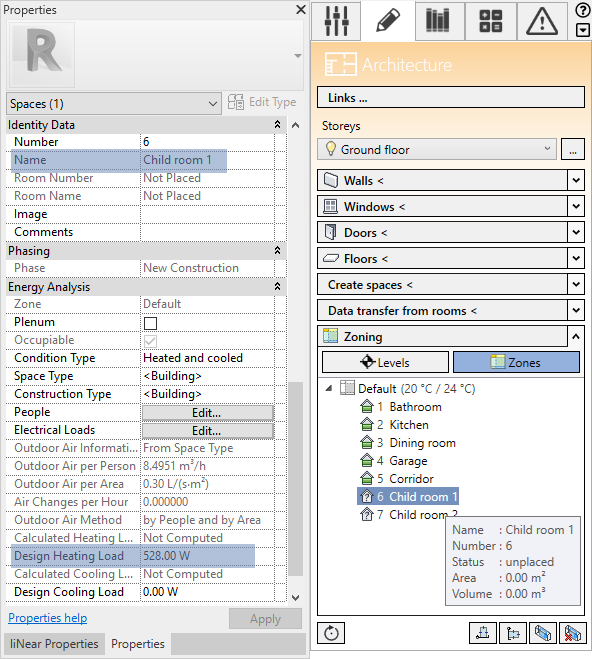
The values of the parameters selected for the import were taken over and the so far non-existing rooms were created as non-placed spaces.
What to do next
The non-placed rooms can now be assigned.