Configuring and Inserting Heating/Cooling Elements
Shows step-by-step how to configure heating/cooling elements and how to insert them into the model.
Before you begin
Using the heating/cooling element configurator, you define the dimensions and connection position of a heating/cooling element, and add information about the manufacturer and model. Then insert the heating/cooling element into the model.
Requirements:
-
You are in a top view.
-
You have constructed walls on which the radiators can be placed.
Navigate to:
Procedure
- Select the reference level in the Construction level/ Offset (+/-) section.
- Select the datum level. If the datum level conforms to the reference level, select Current storey.
- Enter an offset to the datum level.
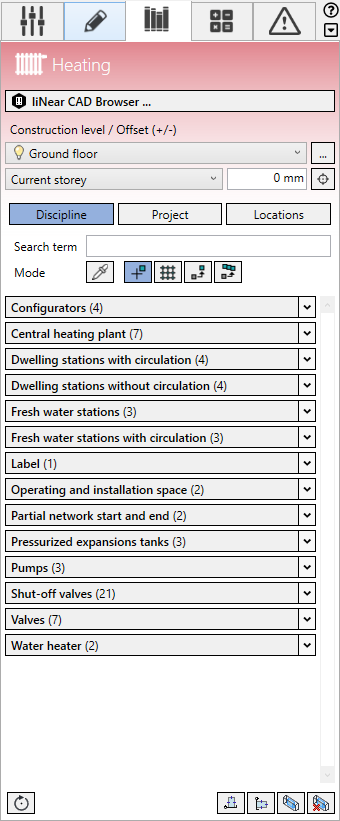
- Click Discipline.
The configurators and families of the heating or cooling discipline are displayed.
- Open the Configurators section.

- Click Heating/Cooling elements ...
The Heating/Cooling elements configurator dialog opens.
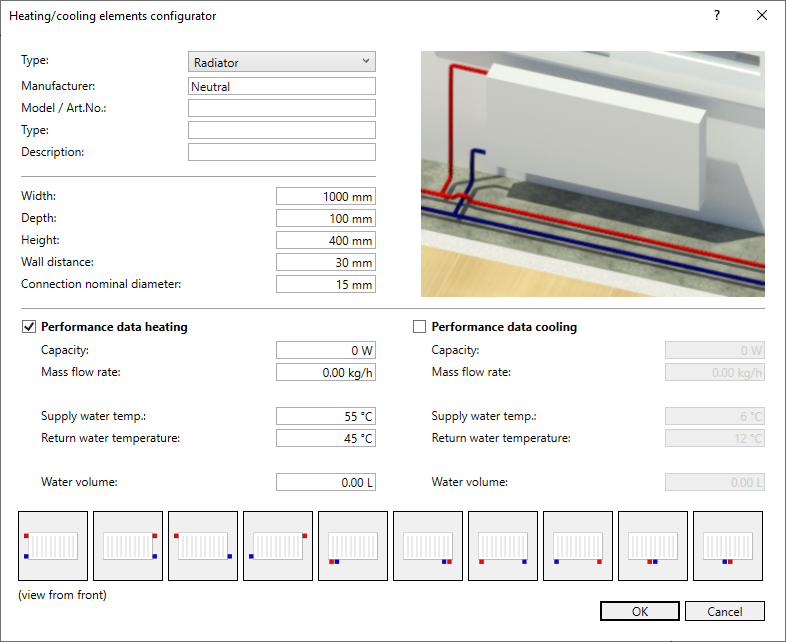
- Select the Type.
- Enter the manufacturer and model data, the type and, if necessary, a description and the dimensions.
- Enter the wall distance, the nominal diameter of the pipe connections and the water volume.
The wall distance is kept automatically when inserting the heating/cooling element on the wall.
- Enter the performance data.
- Use the pictograms to select the desired location of connection.
- Close the dialog with OK.
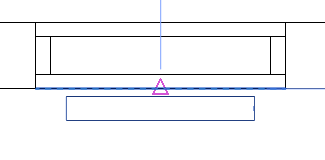
- Place the heating/cooling element. If you select the inner wall edge for insertion, the wall distance is automatically kept.
- If necessary, place the same model with the same dimensions in a different location.
- Press ESC twice to exit the command.
Results
The heating/cooling element is inserted in the model.
