-
Click on
 and select the desired Excel file.
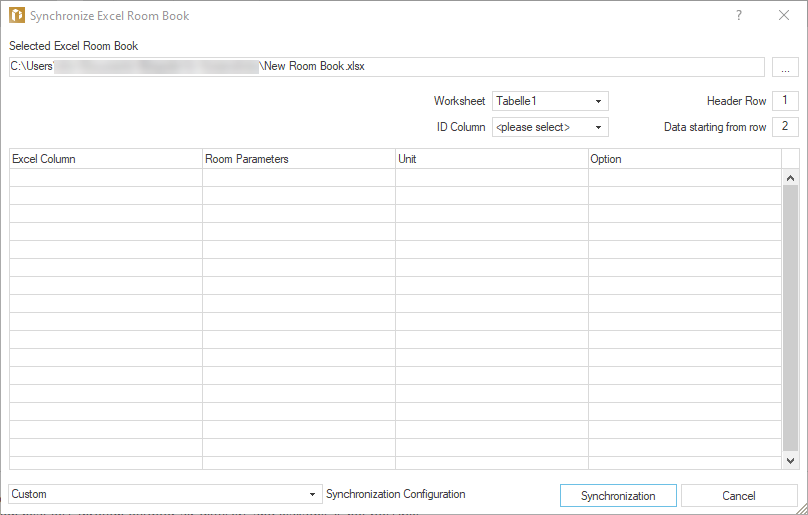
The Excel room data sheet, into which the room data is transferred, is selected.
-
If necessary, adjust the Worksheet to which the data is transferred.
-
Click in the table and enter the name of the Excel Column in the room data sheet where the storey names are listed in the newly added row.
-
In the Room Parameters field, click
 and select the room parameter Storey Name from the context menu that appears under General.
 -
Create another row with the name for the Excel Column of room names by clicking in a free row or pressing F5, and select the space parameter Room Name under General.
-
Add additional rows for all room parameters to be transferred, name each Excel Column, and assign the corresponding room parameters.
-
Select the desired entry from the Synchronization Configuration drop-down list. If you select Custom, you can assign the desired setting for each parameter by clicking
in the respective row. -
Click on Synchronize.
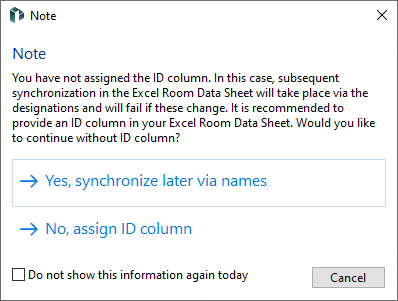
The following note appears.
-
Select No, Assign ID Column so that future synchronizations between the Excel room data sheet and LINEAR Building can be carried out successfully even if storey and/or room names have been changed.
-
Select the entry <Append to End> for the ID Column and click again on Synchronize.
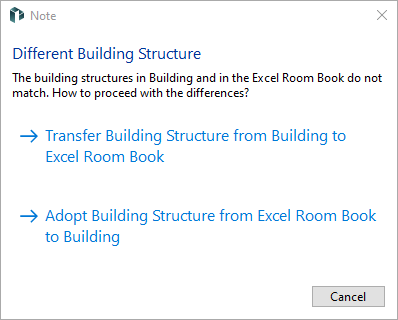
The following note appears.
-
Select Transfer building structure from building to Excel room data sheet.
The desired room data has been transferred to the selected Excel room data sheet.