Importing Storey Data
Shows step by step how to import storey data from a linked model.
Before you begin
You want to copy the levels of a linked model into your drawing.
Requirement:
Your Revit model is linked to another model that contains levels.
Navigate to:
Procedure
- Click Storey...
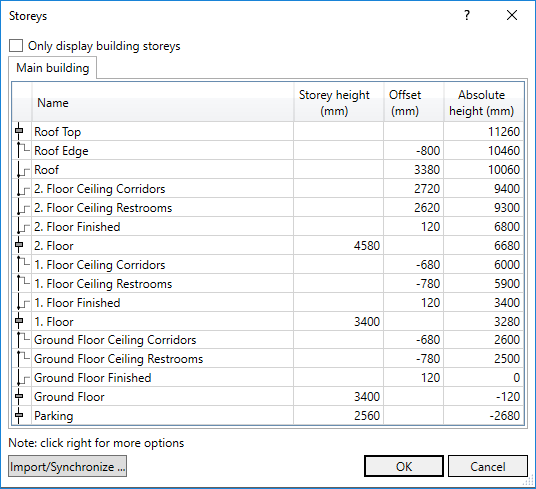
The Storey dialog opens:

- Click Import/synchronize....
The Levels from linked documents dialog opens.
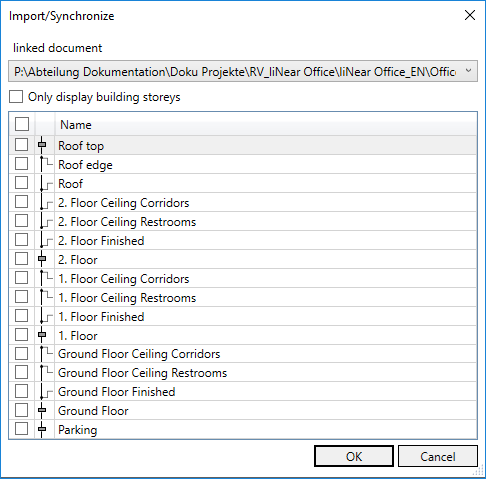
- If there is more than one link, select the linked document from the drop-down list you want to import the levels from.
- Activate all levels you want to import and confirm with OK. Tip:
Use the check box in the table header to activate or deactivate all levels.
- Decide in the following prompt whether existing layers in the model should be deleted. Attention:
If you answer Yes to the prompt, all existing levels are deleted and the selected levels are imported.
If you answer No to the prompt, the selected levels are added to the existing levels. Any duplications are differentiated by a count index on the imported level.
Results
The levels are imported and are displayed in the Storey dialog.