-
Make sure that the project level is selected in the Building Structure so that the Settings button is visible.
-
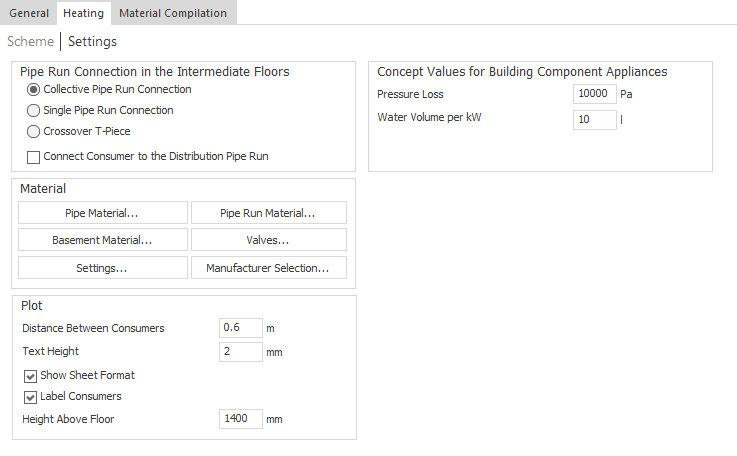
Click Settings.
The project level Settings opens.
-
In the Material section, click on Settings....
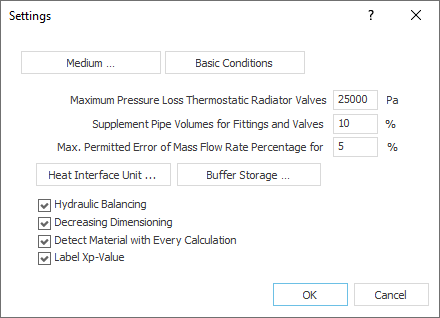
The Settings dialog opens.
-
If necessary, adjust the maximum pressure loss of the thermostatic valves and the pipe volume supplement for fittings and valves.
-
Make further settings if required.
-
Click Medium... to open the Medium dialog. In this dialog you can change the medium of the pipe network or, for example, adjust the viscosity of the medium.
-
Click Basic conditions....
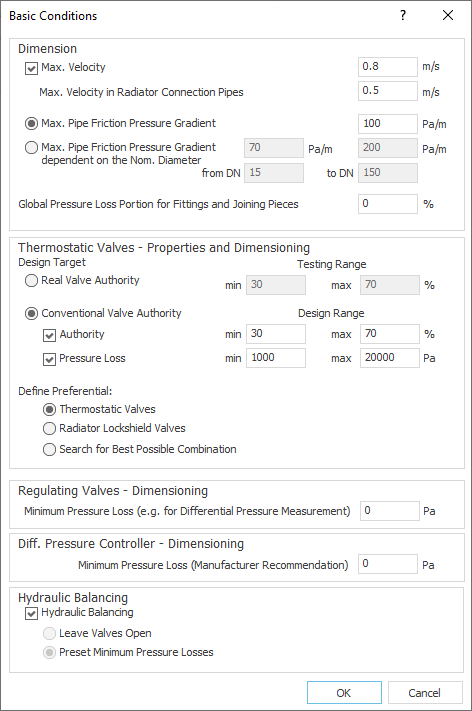
The Basic conditions dialog opens.
-
If necessary, adjust the conditions for dimensioning, thermostatic and regulating valves, differential pressure closed-loop controllers and hydraulic balancing and close the dialog with OK.
-
Click on Heat Interface Unit and/or Buffer Storage to make settings for heat interface units and/or the buffer storage dimensioning.
-
Close the dialog Settings with OK.
You have configured the settings for the pipe network calculation of a scheme.