Creating Shared Parameters
Shows step-by-step how to create a shared parameter in connection with the dynamic properties dialog.
Before you begin
You want to be able to write certain data to elements of an element class and display it in the properties dialog.
Requirements:
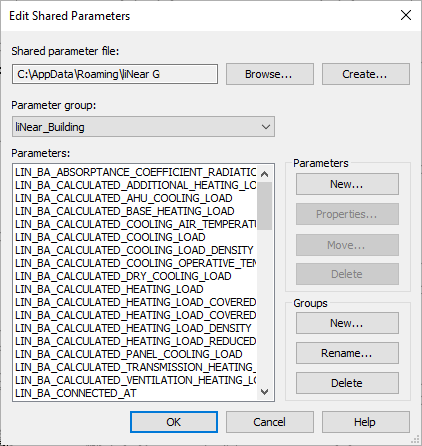
You use the specified file for shared parameters.
Navigate to:
Applies to all disciplines.
Procedure
- From the drop-down list, select the parameter group in which you want to create the parameter.
- Click New.... The dialog Parameter Properties opens.
- Enter a name for the parameter.
- Select the Discipline and Data type for the new parameter. This dialog refers to the Revit internal disciplines.
- Close the Parameter properties dialog and the Edit shared parameters dialog by clicking OK and navigate to
- Select the desired property set and click on
 New attribute in the Properties area. The Select parameters: dialog: Click on ... .
 - Click on the Definition file to list the parameters of the shared parameter file.
- Select the newly created parameter and confirm your selection with OK.
Results
The new parameter has been created and added to the desired property set. You can change the parameter in the next step according to your requirements.