-
Open the Convert Model to Scheme area by clicking on
 .
. -
From the drop-down lists, select the desired discipline and the building part for which the scheme is to be created.
-
Click on
 Adjust Storeys and if necessary correct the values for the floor structure and suspended ceiling. Close the dialog with a click on OK.
 -
Click Convert Model to Scheme <.
You will be prompted to select an element from the pipe network.
-
Click on a component of the pipe network for which you want to create a scheme.
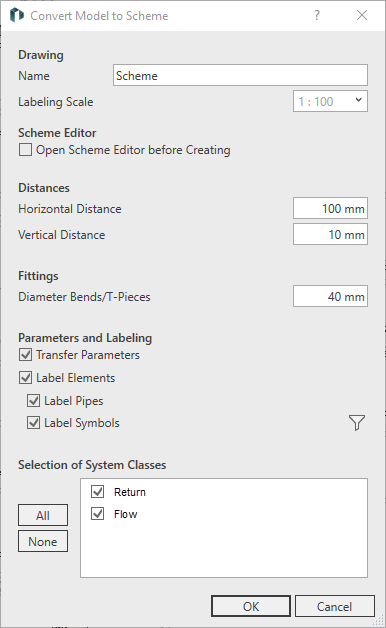
The Convert Model to Scheme dialog opens.
-
Customize the name for the drafting view of the scheme.
-
Specify whether the scheme should be opened for possible post-processing in the Edit Scheme dialog of the Scheme Editor before creating the drafting view.
-
Check the remaining values and settings in the dialog Convert Model to Scheme and make any necessary adjustments.
-
Click OK.
The scheme has been created and saved as a drafting view, or it is open for editing in the Edit Scheme dialog. If necessary, click Apply in the top right corner of the dialog Edit Scheme to create and save a drafting view of the edited scheme.
If necessary, you can modify the scheme at any time using the tools at the bottom of the tab Design: Scheme and/or with the function Scheme Editor < of the tab.