-
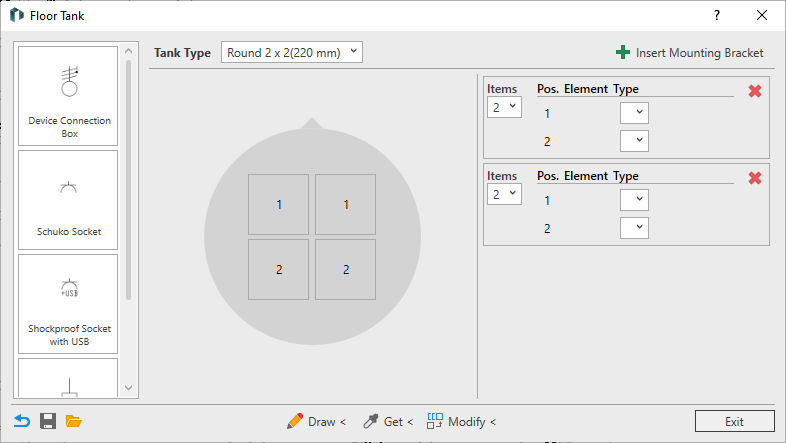
Open the configurator for floor boxs in the Configurators area by clicking on Floor Box ....
-
Select the basic Tank Type from the drop-down list.
The selected tank type determines the final size of the floor box.
-
Create the desired number of mounting brackets by clicking on
 Insert Mounting Bracket or by clicking on
  delete existing mounting brackets.
 -
Specify the desired number of Positions for all mounting brackets.
-
Drag and drop the required components from the component library to their positions.
-
Check and change the Type for your components if necessary.
-
Click Draw <.
The Floor Box dialog is hidden and the configured floor box is attached to the cursor.
-
Make sure that you have activated the placement mode Place on surface or Place on work plane in the Revit Ribbon.
-
Click to place the floor box in all desired rooms. Finish the process with ESC.
All floor boxes are placed in the desired rooms with the set configuration.