-
Activate the view whose properties you want to transfer.
-
In the Productivity group, click Transfer view properties.
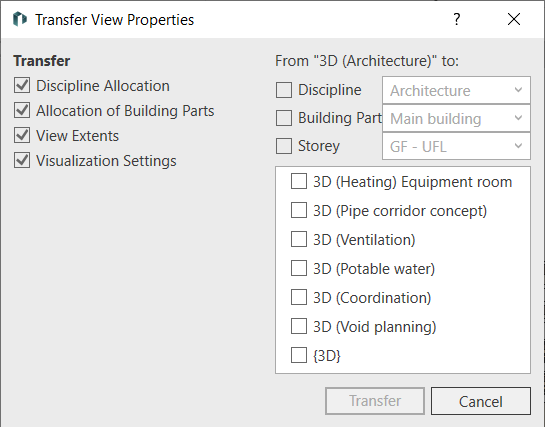
The Transfer view properties dialog opens.
-
In the Transfer area, activate the checkboxes for the properties that you want to transfer to other views.
-
If required, filter the available views in the From “Name of current view” area:
-
Activate the Discipline checkbox and select the desired discipline in the drop-down list.
-
Activate the checkbox Building part and select the desired building part in the dropdown list.
-
Activate the checkbox Storey and select the desired storey in the drop-down list.
-
-
Activate the check boxes of all views to which you want to transfer the properties of the current view.
-
Click Transfer.
You have transferred the selected properties of the current view to other views of your project.