In this area, you will find lists of available views grouped by view type. Views that match the current configuration of the project (Disciplines …, Building Parts …, Storeys …) are marked with the symbol  . You can filter the lists, create new views, customize view names, and delete views. You can add additional disciplines and building parts to selected views.
You are here:
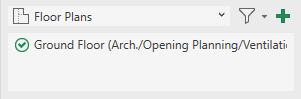
List of Views
The selected view is used as the active view in the drawing area.
The views are grouped by view types, which are available to you under the respective entries in the drop-down list.
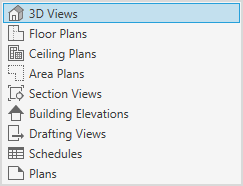
The elevations North, East, South and West are usually included in the template. You can create new building views in top views using the View function in the Create group on the View tab of the Revit ribbon.
Status Display of Views ( ,
,  ,
,  )
)
Depending on the contents of the views in terms of the disciplines, building parts, and stories they contain, and the current configuration of the corresponding areas on the Project tab, each view is assigned its corresponding status.
The following status symbols are possible:
| Status | Meaning |
|---|---|
|
The selected settings in the Disciplines ..., Building Parts ... and Storeys ... sections match the content of the view. |
|
The view is not set up for use with the LINEAR view control because assignments regarding disciplines, building parts, and/or storeys are missing. These can be, for example, views from self-created templates, views from existing projects that were not created with the LINEAR Solutions or views from which required assignments have been removed. Select the views and assign disciplines and/or building parts by activating the checkboxes and, if necessary, select a storey. (Depending on the view type, storey assignments are not possible or necessary.) |
|
The selected settings in the Disciplines ..., Building Parts ... and Storeys ... sections do not match the content of the view. If necessary, change the settings in the Disciplines ..., Building Parts ..., and Storeys ... sections or the contents of the view so that the view has a different status. |
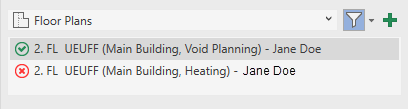 Filtering Views
Clicking on Filter Settings 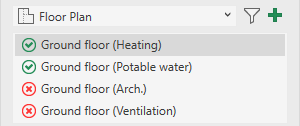 opens the following context menu with filter options for the lists of available views.
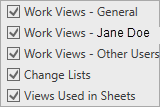
You can use the individual options to show or hide the corresponding working views (general, current user, other users), change lists, and views used in plans in the lists of available views. Click Enable/Disable Filter  to apply the filter settings.
 Creating View
Opens the Create New Views dialog, where you can configure the creation of new views. The current selection of the areas Disciplines ... and Building parts ... (gray coloring of the selected entry) as well as the view type and, if applicable, the selected storey are transferred as default settings to the corresponding setting areas of the dialog. (Depending on the view type, storey assignments are not possible or necessary.)
Edit Views
When the cursor is on a view, additional functions are displayed.
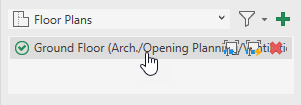
|
Meaning |
|
|---|---|
 Rename view |
Opens the Rename Views dialog where you can change the name of the view. |
 Name View Automatically |
Automatically renames the view according to a naming scheme. This is useful, for example, if you have subsequently assigned additional disciplines to a view. Naming scheme: View type (Building part, Discipline1/Discipline2) Examples:
If there is only one building part, the name of the building part is not used in the name of the view. |
 Delete View |
Deletes the view. The currently selected view cannot be deleted. If necessary, select a different view and then click again on |