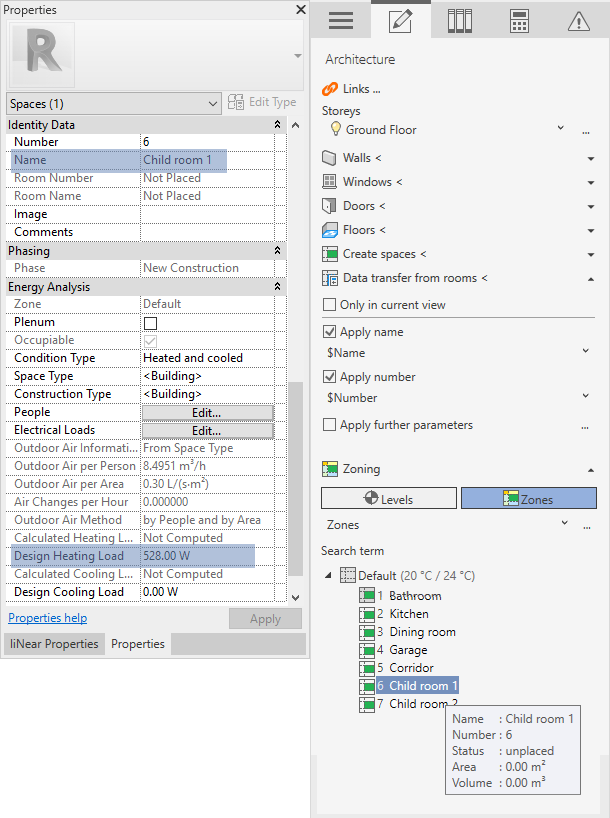
-
Click on Excel import in the Interoperability area.
-
Select the Excel file to import and click Open.
The dialog Presettings opens.
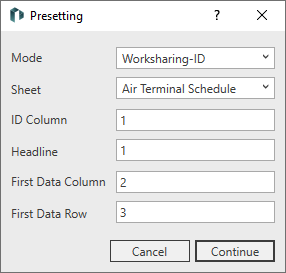
-
Select the Room Allocation as the Mode and the worksheet you want to import.
-
Check if the column and row specifications match the structure of the worksheet and click Next.
The dialog Room Allocation opens.
-
Activate an Excel Parameter to be used for room allocation.
-
To subsequently link all other Excel parameters with Revit parameters, you can
- try an automatic assignment of Excel parameters to Revit parameters by clicking on
 , or
, or - click on
 in the corresponding row of the Select Parameters dialog to make a manual assignment.
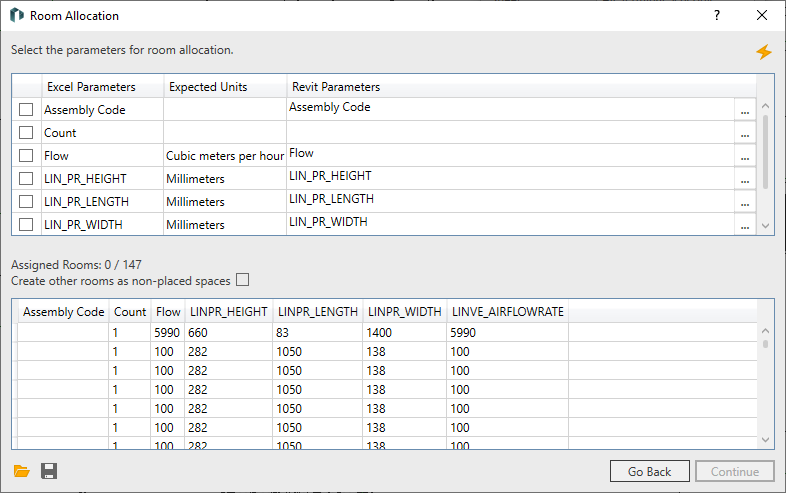
- try an automatic assignment of Excel parameters to Revit parameters by clicking on
-
Activate the checkbox Create other rooms as non-placed spaces and click Next.
The dialog Import: … opens.
-
Select the Excel Parameters that you want to import.
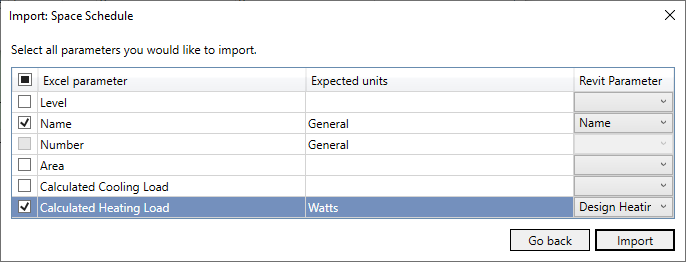
-
Click Import.
The values of the parameters selected for the import were taken over and the so far non-existing rooms were created as non-placed spaces.