You are here:
Appliance (Tapping Points)
Clicking on the symbol of a appliance opens the following context menu, which allows you to change the connection situation and the component data:
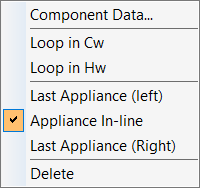
Component Data ...: Opens the Technical Data dialog where you can set the data of the component used for the pipe network calculation.
Loop in CW, Loop in HW
Determines whether the cold water or hot water pipes are looped through.
Last Appliance (left), Appliance In-Line, Last Appliance (right):
If necessary, click the desired connection variant to assign it to the appliance. The current connection variant is highlighted in color.
Multiple Selection of Symbols
If you have selected several symbols, right-click on one of them to open the following context menu: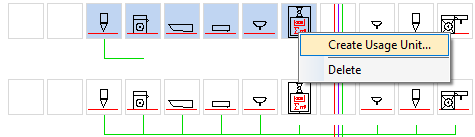
You can already define the usage units according to DIN1988-300 when compiling the scheme.
Create usage units: Opens the Usage Unit dialog where you can define the name of the usage unit. The usage unit is then highlighted in color in the pipe run scheme.
Manifolds and Transitions 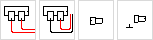
Clicking on a manifold or transition opens the following context menu:
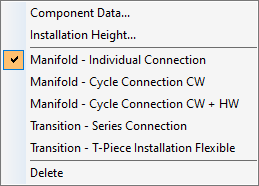
Component Data ...: Opens the Technical Data dialog where you can set the data of the component used for the pipe network calculation.
Installation Height: Opens the dialog Installation Height, in which the height above the floor for the component is defined.
Manifold, Individual Connection, Manifold, Ring Main Connection CW, Manifold, Ring Main Connection CW + HW
For manifold symbols, an alternative connection variant can be selected via the context menu. If you select a different connection, the symbol is automatically replaced.
Transition Series Connection, Transition T-Piece Installation Flexible
For transition symbols, an alternative connection variant can be selected via the context menu. If you select a different connection, the symbol is automatically replaced.
Branches
Click on a branch to open the following context menu:
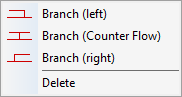
Branch (Left), Branch (Counterflow), Branch (Right)
Sets the branch type. The current branch type is highlighted in the context menu. If necessary, click a desired branch type to assign it to the branch. The symbol in the scheme is then automatically replaced.Pipe Run Buttons on the Storeys 
Click on the pipe run button of a storey to open the following context menu:
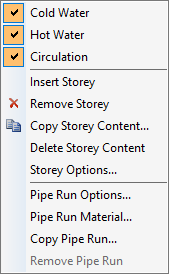
Cold Water, Hot Water, Circulation
Defines the media of the pipe run. Select the media to be applied to the respective pipe run or uncheck it if necessary. The media are mapped on the pipe run buttons of the storeys.
Insert storey
Inserts a new story beneath the story in which you call the context menu.
Remove storey
Removes the respective storey with all its components from the scheme.
Copy Storey Content...: Opens the Copy Storey dialog, which allows you to copy storey contents and paste them into other storeys.
Delete Storey Content
Deletes the content of the respective storey.
Mirror Left Storey Side , Mirror Right Storey Side
Mirrors the symbols of the left or right storey side to the opposite projectile side. Contents located on the opposite side of the storey will be overwritten.
Storey Options...: Opens the Storey Options Data dialog where you can define the pipe routing in the storey, among other things.
Pipe Run Options...: Opens the Pipe Run Options dialog where you can specify, among other things, the type of pipe run valve used and the design temperatures of the pipe run.
Pipe Run Material...: Opens the Pipe Section Data dialog where you can define settings for the ascending pipe run of the storey.
Copy Pipe Run...: Opens the Copy Pipe Run dialog, which allows you to copy pipe runs and their contents and paste them into other pipe runs. If an existing pipe run with contents is selected as the target, the contents of the target pipe run will be overwritten during copying.
Remove Pipe Run
Removes the respective pipe run with all its contents from the scheme.
Numbered Pipe Run Buttons 
Right-click on a numbered pipe run button to open the following context menu:
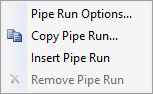
Pipe Run Options...: Opens the Pipe Run Options dialog where you can specify, among other things, the type of pipe run valve used and the design temperatures of the pipe run.
Copy Pipe Run...: Opens the Copy Pipe Run dialog, which allows you to copy pipe runs and their contents and paste them into other pipe runs. If an existing pipe run with contents is selected as the target, the contents of the target pipe run will be overwritten during copying.
Paste Pipe Run
Adds another pipe run before the currently selected pipe run.
Remove Pipe Run
Removes the respective pipe run with all its contents from the scheme.