-
Save the Revit file containing the user-defined pipe type as a Revit project template file (file extension .rte) in the directory .\ ProgramData\\liNear GmbH\Solutions xx\CAD\RevitMain\User-Standards\User Templates\ 20xx\ and open the file.
-
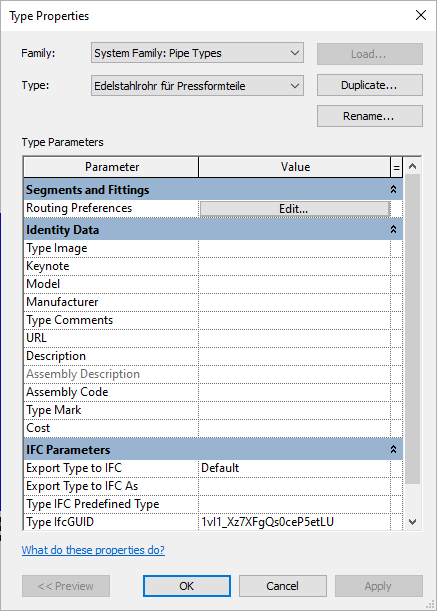
Double-click on the corresponding pipe type in the Revit project browser under .
The Type properties dialog opens.
-
Enter a manufacturer in the Manufacturer field if there is no entry yet.
-
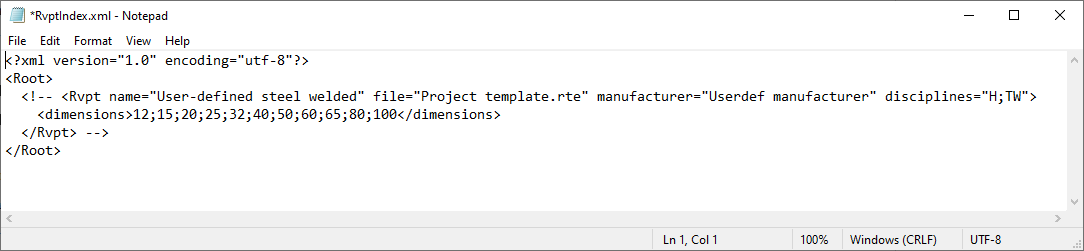
From the file path .\ ProgramData\\liNear GmbH\Solutions xx\CAD\RevitMain\User-Standards\User Templates, open the file RvptIndex.xml (for pipe systems) in a text editor.
-
Remove the commented-out lines in the XML code by removing the <!-- and --> elements.
-
For the name attribute, enter the name of the pipe system that is displayed in the Type drop-down list in the Revit Type properties dialog, e.g. name=”User-defined welded steel”.
-
Enter the name of the Revit project template file for the file attribute, e.g. file=”Project template.rte”.
-
For the manufacturer attribute, enter the manufacturer name that you used in the Type properties dialog in Revit, e.g. manufacturer=”Userdef manufacturer”.
-
For the disciplines attribute, enter the abbreviations for the disciplines for which the pipe system should be available, separated by a semicolon. e.g. e.g. disciplines=”H;PW” for the disciplines heating and potable water.
-
Enter the nominal diameters for the pipe system in the XML node <dimensions> separated by semicolons, e.g. <dimensions>20;25;32;65;80;100;120</dimensions>.
-
Create a copy of the entire XML node Rvpt and change the attribute data accordingly if you want to reference additional pipe systems.
-
Save and close the XML file.
The next time you start Revit with the LINEAR Solutions, the pipe system will be available under in the Manufacturer and Pipe system drop-down lists.