-
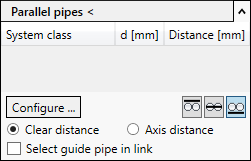
Open the Parallel pipes section.
-
Click Configure....
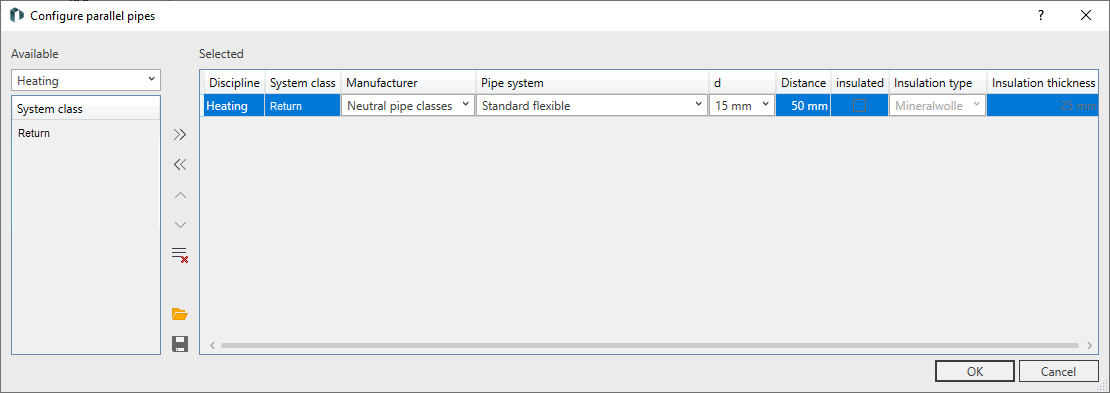
The Set parallel pipes dialog opens.
-
If necessary, remove individual pipes by selecting the row and clicking << or delete the entire list using
 Delete configuration.
 -
In the Available section on the left, select the discipline and system class for the desired pipe.
-
Click
 Apply to configuration to add the system class to the configuration table in the Selected section.
 -
In the configuration table, select the pipe system, diameter and distance to the previous pipe.
-
Add additional pipes to the configuration table if necessary.
-
Click OK to apply the settings.
The parallel pipes are configured and are displayed in the Parallel pipes section.