-
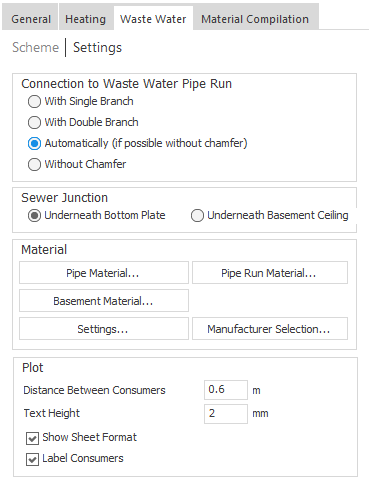
Make sure that the project level is selected in the Building structure to make the Settings button visible so that you can access the Settings at the project level.
-
Click Settings.
The project level Settings opens.
-
In the Material section, click Configuration....
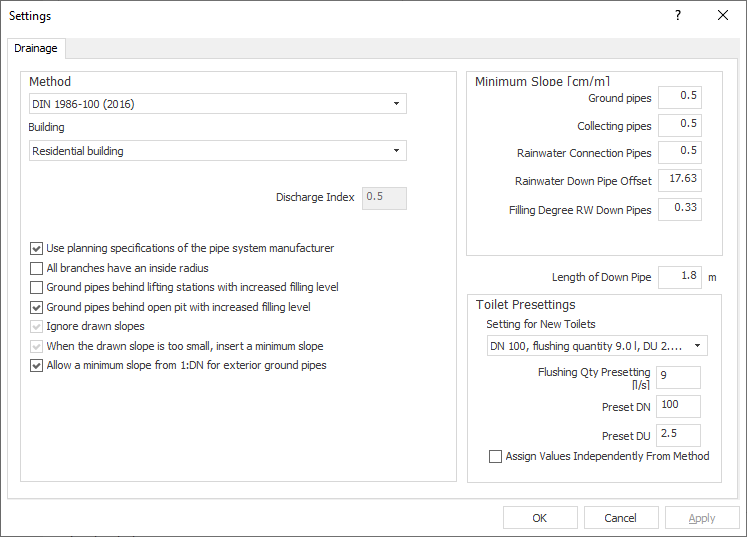
The Settings dialog opens.
-
Make sure that your desired calculation method is selected in the upper drop-down list and adjust the building type via the second drop-down list if necessary.
-
Specify which of the checkbox options of the Method section should be taken into account in the pipe network calculation.
-
If necessary, adjust the minimum slope of the different pipe types.
-
Set the length of downpipe.
-
If necessary, adjust the Toilet presettings and activate the Assign values method-independently checkbox so that your entered values are assigned.
-
Close the dialog with OK.
You have configured the settings for the pipe network calculation of a scheme.