Details on Parts List e-klimaX
Information about the dialog Parts list e-klimaX of the function e-klimaX export.
You are here:
or
 Activate/deactivate filter, Filter settings
 to open the Filter settings. You can select from several filter criteria; some filters such as filter by air type or filter by item offer a drop-down list with the types available in the list. Regular expressions (regex patterns, .NET variant) can be used to filter the list in all input fields.
Position number drop-down list (numbering system)
Using the drop-down list, you can select according to which numbering system (circle A, B or C) the item numbers for the parts are displayed in the parts list.
 Assign item numbers
Opens the Item numbers dialog. If you have not previously assigned item numbers for the components in the numbering systems A, B or C, you can assign item numbers in this dialog. Select whether you want to maintain existing numbers and resolve conflicts automatically. You also specify Prefix, Postfix as well as a Position number for the starting value of the numbering. If leading zeros are entered, the consecutive position number is formatted with a corresponding fixed block width (e.g. 001, 002, etc.).
 Search for item numbers
Opens a dialog where you can enter an item number to search for it.
 Select corresponding components in project
Click on this button to search for the component selected in the table in the model and mark it visually so that even small components can be localized. Click on a marker to zoom in on the component and select it. Delete the markers by clicking on Hide all locations in the Control Board. For a comfortable use of this function, a suitable division of the screen area into Revit view and e-klimaX parts list (e.g. two screens) is recommended.
 New free text
When used for the first time, this creates a Free text area and inserts a new row in which you can enter an additional comment, for example. Repeated clicks on the button create new rows in the Free text area.
 Flange profiles...
Opens the Configure flange profiles dialog where you can define the flange profile parts for the air ducts.
Export ...
Starts the data export either according to an XML or Excel file. A file explorer opens where you specify the location and file name.
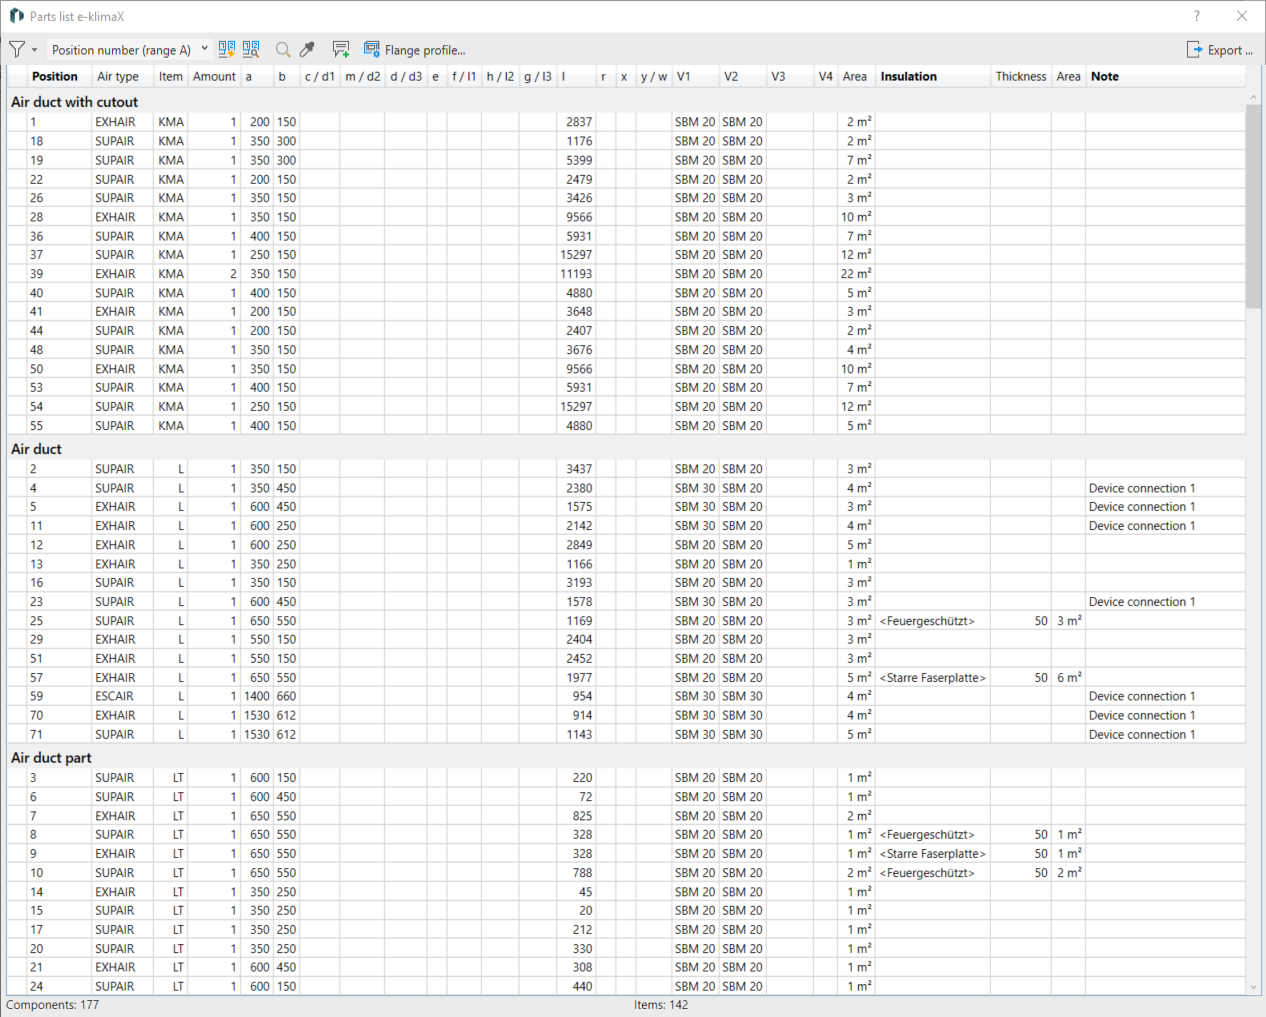
Air duct and part data table
The table lists the duct components of the air duct network grouped by component type with their parameters. By clicking the column headlines fields you can sort the table in ascending or descending order.
The fields of the Position and Note columns can be opened and edited for the individual components with a double-click. If a duct has been assigned a pass length, the assigned pass length is indicated in the Comment column.
The entries in the Insulation column initially contain only the Revit type for unknown insulation types. After selecting the respective field, you can use the  button to open the Select insulation according to e-klimaX dialog, in which you can specify an insulation type according to the e-klimaX classification via the selection.
All other columns, such as air type, article, quantity, dimensions (a, b, c / d1, ...), surface and thickness and surface of the insulation only reflect the component parameters and cannot be edited. If you select an item with a message (reddish marking of the fields), details of any missing or incorrect data are displayed below it.