Naming System Types Automatically
Shows step-by-step how to rename system types already present in the project according to the specifications in the LINEAR options.
Before you begin
The Automatically rename system types function renames all system types in the project according to the settings in the LINEAR options.
Requirement:
Pipes, ducts and components are already included in the project whose system types do not correspond to the specifications in the LINEAR options.
Navigate to:
Applies to: Heating, Potable Water, Waste Water, Ventilation, Radiant Heating and Cooling, Cooling, Gas, Fire Protection.
Procedure
- Click Options on the Tab LINEAR of the Revit-Ribbon in the Administration group. The Options dialog opens.
- Switch to the System types section.
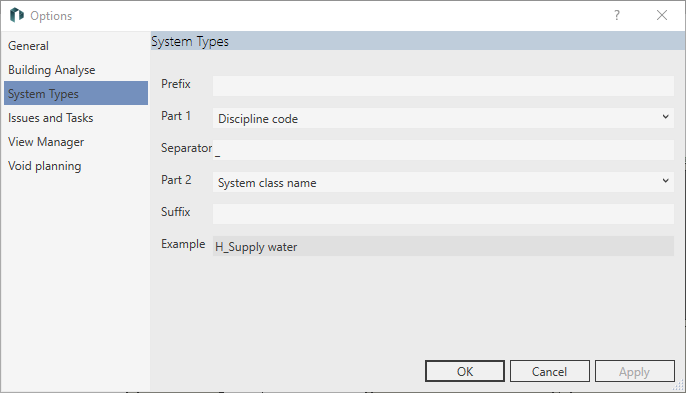
- Define the composition of the system type names: In the Part 1 and Part 2 drop-down lists, select the code or name for the system class and discipline.
- You can add prefixes, separators, and suffixes to the system type description.
- Close the dialog with OK. Note:
If the system types in the project were named according to the LINEAR discipline_LINEAR system class scheme, the changes are applied directly in the Options dialog and the following steps are omitted.
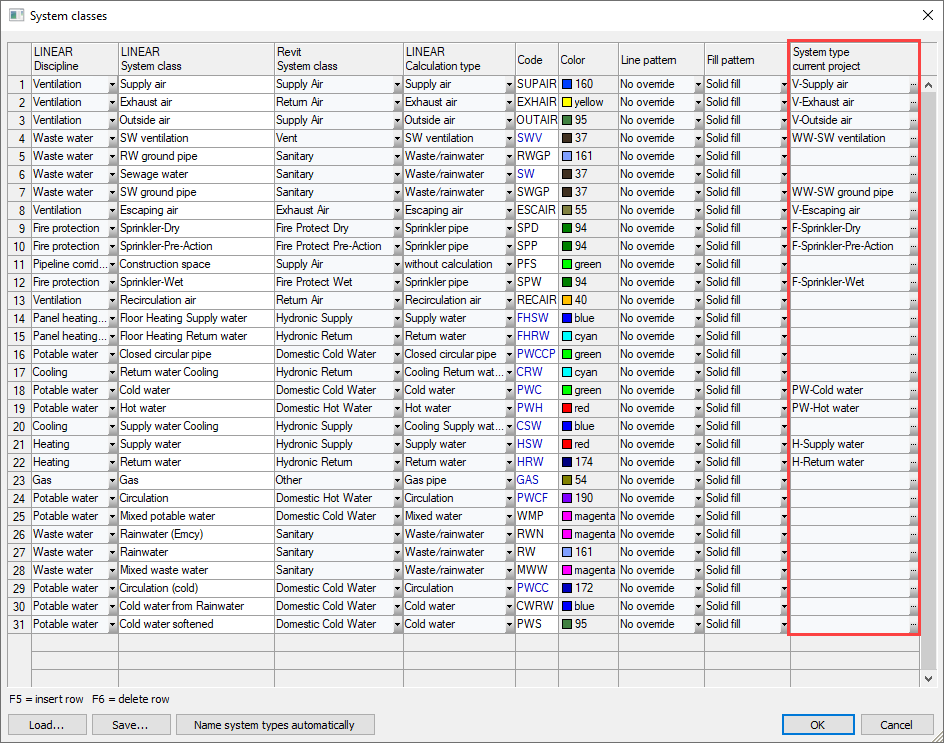
- In the System class section, click
 System classes.
 The System classes dialog opens. In the System type current project column, you see the system types contained in the project.
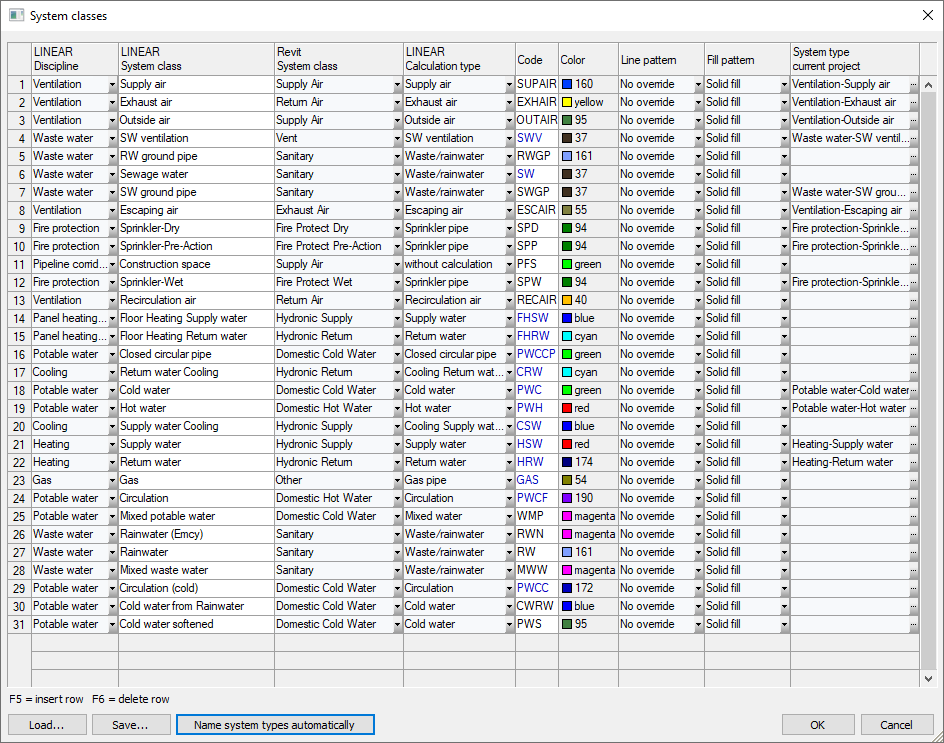
- Click Automatically name system types.
Results
The system types in the project are renamed according to the settings in the options.